
Please note: This post may not be relevant anymore as newer builds of the application proxy support internal proxies by editing the following two files:
C:\Program Files\Microsoft AAD App Proxy Connector\ApplicationProxyConnectorService.exe.config
C:\Program Files\Microsoft AAD App Proxy Connector Updater\ApplicationProxyConnectorUpdaterService.exe.config
Add / update the <defaultProxy> section under the <configuration><system net> in the two config files above
<configuration>
<system net>
<defaultProxy>
<proxy proxyaddress=”http://address of your proxy:port” bypasslocal=”true/false” usesystemdefault=”true/false” />
</defaultProxy>
</system.net>
The remainder of this post is likely deprecated BUT for the sake of still having the info available:
First and foremost: ensure that your on-prem proxy allows the IP Address of your server to reach *msappproxy.net*
On the 2016 Server, you will need to do the following
You want to make sure your server is joined to Azure. If it isn’t done so via domain policy, you can manually get it to join by doing the following. Run GPEdit and navigate to Computer Configuration > Administrative Templates > Windows Components > Device Registration
Set “Register domain joined computers as devices” to enabled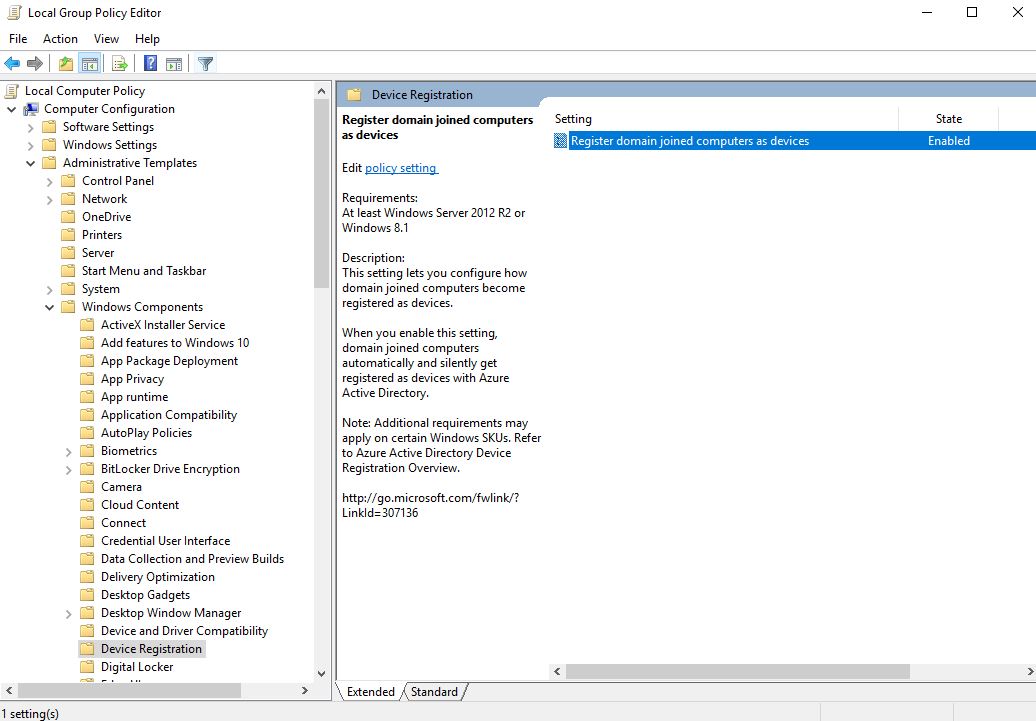
Open internet explorer and configure the proxy with whatever settings are necessary for your environment.
Open an administrative command prompt and run the following to setup a system-wide proxy
netsh winhttp import proxy source=ie
Since the application proxy services will run as Network Service and System, we need to set the proxy for these accounts as well. Download PSexec and copy it over to the 2016 server
psexec -i -u "nt authority\network service" cmd.exe
In this newly opened cmd window, we want to launch internet explorer. So CD to “C:\Program Files\Internet Explorer”. Then type in iexplore.exe to open internet explorer
Configure the proxy in this newly opened IE instance, and then close internet explorer
We now want to do the same thing we just did, only we want to use the System account, so repeat the same steps in #4 and #5, but this time use the username “nt authority\system”
Using the same cmd window opened in step #5, we also want to make sure the system is going to register with Azure. Run the following command
dsregcmd /join
Download the Application Proxy Connector from https://portal.azure.com
Click on Enterprise Applications
Click on Application proxy
Click on Download connector 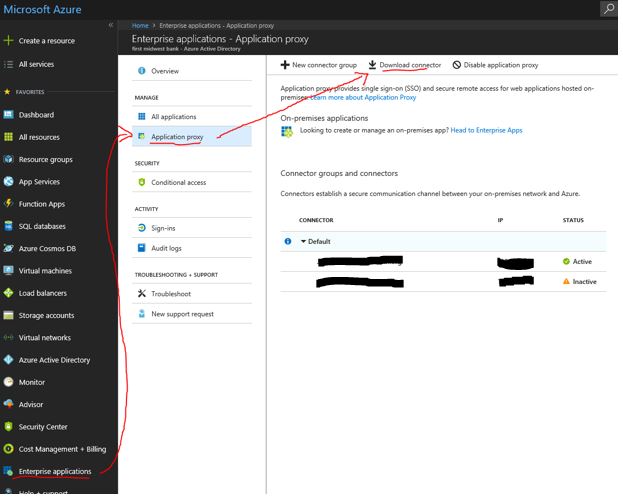
Run the downloaded file on the server as administrator
Log in with global admin credentials at the prompt (The prompt won’t work right if you didn’t disable IE Enhanced Security Policy in step 8)
The server should now be listed in azure in the same location you navigated to in step #9
Last but not least, launch the port checking page for the Azure Application Proxy from the server https://aadap-portcheck.connectorporttest.msappproxy.net/ You should see green checkmarks across the board. If you see any red, your application proxy server may show up on the proxies page in azure, but it may show as inactive. Notice in the image above you see one listed as active and the other as inactive. The inactive one went through the entire setup but the proxy was blocking certain ports. If this is the case for you, you will likely need to battle it out with the person in charge of administering your proxy.